Virtual Clusters
This is a detailed guide for Virtual Clusters (Cloud Native Deployments). For an overview of all runtime types and how to choose between them, see Runtimes Overview.
Virtual Clusters let you run Kubernetes workloads within the Codesphere infrastructure. Each Virtual Cluster provides a dedicated Kubernetes environment for your resource group, supporting standard Kubernetes workloads and tools.
Each Virtual Cluster is isolated, with its own control plane and resource limits. You can deploy, update, and remove workloads independently and securely from other resource groups.
Virtual Clusters are implemented as managed services within Codesphere. Each Virtual Cluster runs as a managed Kubernetes environment. Codesphere manages the underlying infrastructure, while Virtual Clusters provides you benefits of Kubernetes APIs and supports your native workloads and dependencies.
This feature is intended for advanced users with experience in Kubernetes. If you do not need direct access to Kubernetes primitives, consider using other type of Codesphere runtimes for simpler workflows.
Compatibility
Virtual Clusters are designed for Kubernetes-native workloads. You can bring Kubernetes dependencies and use familiar tools, such as Helm charts, to deploy applications and services directly into the Codesphere ecosystem.
Virtual Clusters follow the Kubernetes Pod Security Standards at the restricted level by default. This means workloads must avoid privileged or host-level access patterns and follow hardened pod and container security settings. Some third-party Helm charts or manifests may require configuration changes before they can run.
Common adjustments include:
- Running containers as non-root users
- Disabling privileged containers and privilege escalation
- Avoiding host namespaces, host paths, and host ports
- Setting an explicit seccomp profile, such as
RuntimeDefault
For example you can deploy Apache Superset in just a few steps from the Codesphere IDE or your landscape, deploying it directly to the virtual cluster:
helm repo add superset https://apache.github.io/superset
helm repo update
kubectl create namespace superset
helm install superset superset/superset --namespace superset
Connectivity
Virtual Clusters are deeply integrated with the Codesphere platform, making it easy to connect your Kubernetes workloads with other Codesphere resources. As part of the Codesphere host cluster, your Virtual Clusters can communicate seamlessly with landscapes, managed services, and other resources within the same team. This integration simplifies complex architectures and enables powerful workflows across your cloud infrastructure.
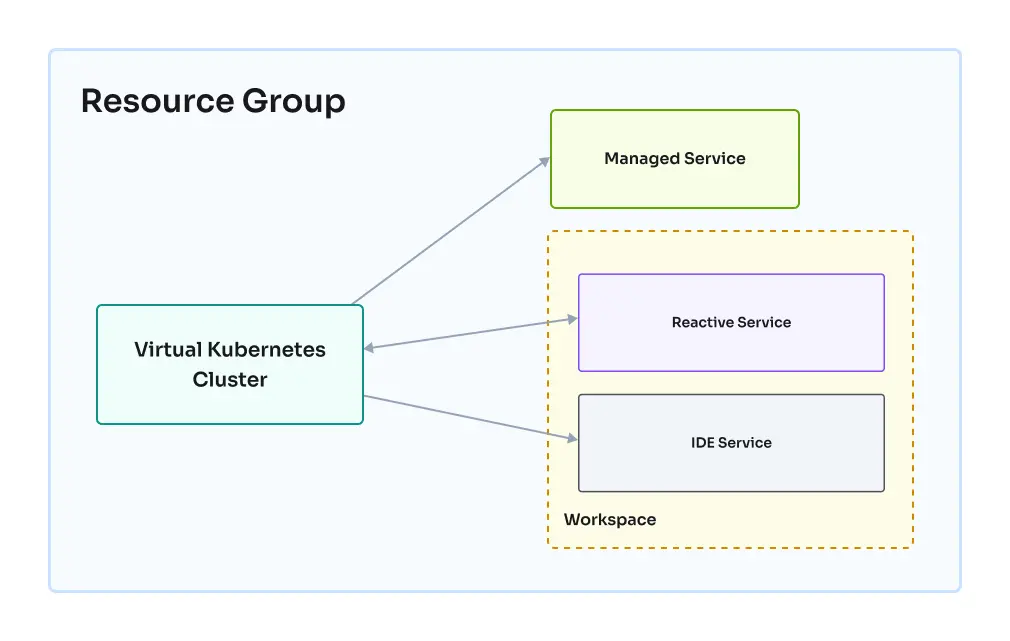
Corresponding accessible text description
Virtual Cluster networking currently supports IPv4 only. IPv6 is not supported.
Reaching Cluster Resources
Kubernetes pods and services running inside your Virtual Cluster are accessible from any workspace within the same resource group. This means you can interact with your applications and services directly from your Codesphere workspaces, making development and troubleshooting more efficient.
To access a service running in your Virtual Cluster, you'll need to know:
- The resource name (e.g. superset)
- The namespace name (e.g. default)
- The Codesphere resource group ID (e.g. 180312) With this information, you can reach your service using a URL in the following format:
http://[RESOURCE_NAME]-x-[VIRTUAL_NAMESPACE]-x-k8s.rg-[RESOURCE_GROUP_NAME]
Allowing load balancer ingress
By default, pods inside the Virtual Cluster are not reachable from external load balancers. To allow inbound load balancer traffic to a pod, add the following label to the pod (or its pod template):
codesphere.com/allow-ingress-traffic: "true"
When this label is present, the platform applies a network policy that permits ingress traffic from the subnets configured by your cluster administrator. Pods without this label are unaffected and remain isolated from load balancer traffic.
If you are using Envoy Gateway in your vCluster, you have to add this label to the EnvoyProxy resource to allow ingress traffic to all routes managed by the Envoy Gateway:
apiVersion: gateway.envoyproxy.io/v1alpha1
kind: EnvoyProxy
metadata:
  name: demo-envoyproxy
  namespace: demo
spec:
  provider:
    type: Kubernetes
    kubernetes:
      envoyDeployment:
        pod:
          labels:
            codesphere.com/allow-ingress-traffic: "true"
This requires your Private Cloud administrator to have configured the permitted source subnets via the global.vcluster.ingressFromSubnets Helm value. If no subnets are configured, the network policy is not created and the label has no effect.
Access from Virtual Cluster
Your Virtual Cluster can also reach out to other Codesphere resources, such as landscapes and managed services (for example, managed Postgres) within the same resource group. This makes it easy to build complex, multi-service applications that span both Kubernetes and Codesphere's solutions.
To access a workspace reactive from your Virtual Cluster, you'll need:
- The landscape reactive service name
- The ID of the workspace where the reactive is deployed You can then use the following URL format:
http://ws-server-[WORKSPACE_ID]-[REACTIVE_NAME].workspaces
Potential Use Cases
- Deploy superset as a helm chart
- Deploy Grafana and connect it to a managed postgres service running in Codesphere
- Deploy Prometheus and connect it to your applications running in Codesphere to monitor custom metrics
- Add a custom resource definition and controllers (e.g. JSPolicy)
Cluster Access
The primary way to interact with your Virtual Cluster is through the kubeconfig file that is injected directly into the workspace filesystem. This configuration file allows you to use kubectl and helm commands directly from your workspace terminal & in the execution steps of your landscape.
The configuration file is automatically injected as ~/.kube/config into the workspace filesystem. kubectl and helm will use it as the default configuration file to connect to the Virtual Cluster.
You can automate and versionize releases in the prepare or run stage of a landscape by executing:
helm upgrade --install my-release my-charts/my-app --version 2.1.0
If you find yourself typing kubectl often, add a shorter alias to your shell profile, e.g. alias k=kubectl.
Triggering a config update
The Kubeconfig file is (re)injected into your workspace when any of the following events occur:
- The Workspace environment variable list is changed
- The workspace is started
- Workspace resources are updated (e.g. plan is changed, landscape is synced)
We are working on improving the synchronization of the kubeconfig file for landscapes and long-running workspaces. For now, if you encounter issues with an ousdated or missing kubeconfig, try changing an environment variable, (re)starting your workspace to trigger a fresh injection of the configuration file.
Dependencies
kubectl and helm binaries are pre-installed in the default Codesphere workspace image. If you are using a custom image, make sure these dependencies are present in case you want to interact with the Virtual Cluster.
Run kubectl version to check both the client and server versions. Following the upstream Kubernetes version-skew policy, keep your kubectl client within one minor version of the Virtual Cluster's Kubernetes server version to avoid compatibility issues.
Managing Clusters
Virtual Clusters are available as a Managed Service in Codesphere. The Clusters lifecycle is managed through the Managed Services interface, where you can create, update, and delete your clusters as needed.
See the Managed Services documentation for more details.
Creating a Virtual Cluster
Currently, each resource group can have only one Virtual Cluster due to the resource group namespace constraints. Before creating a new cluster, check if your resource group contains one.
To create a Virtual Cluster, follow these steps:
-
Go to the Managed Services tab in your Codesphere workspace.
-
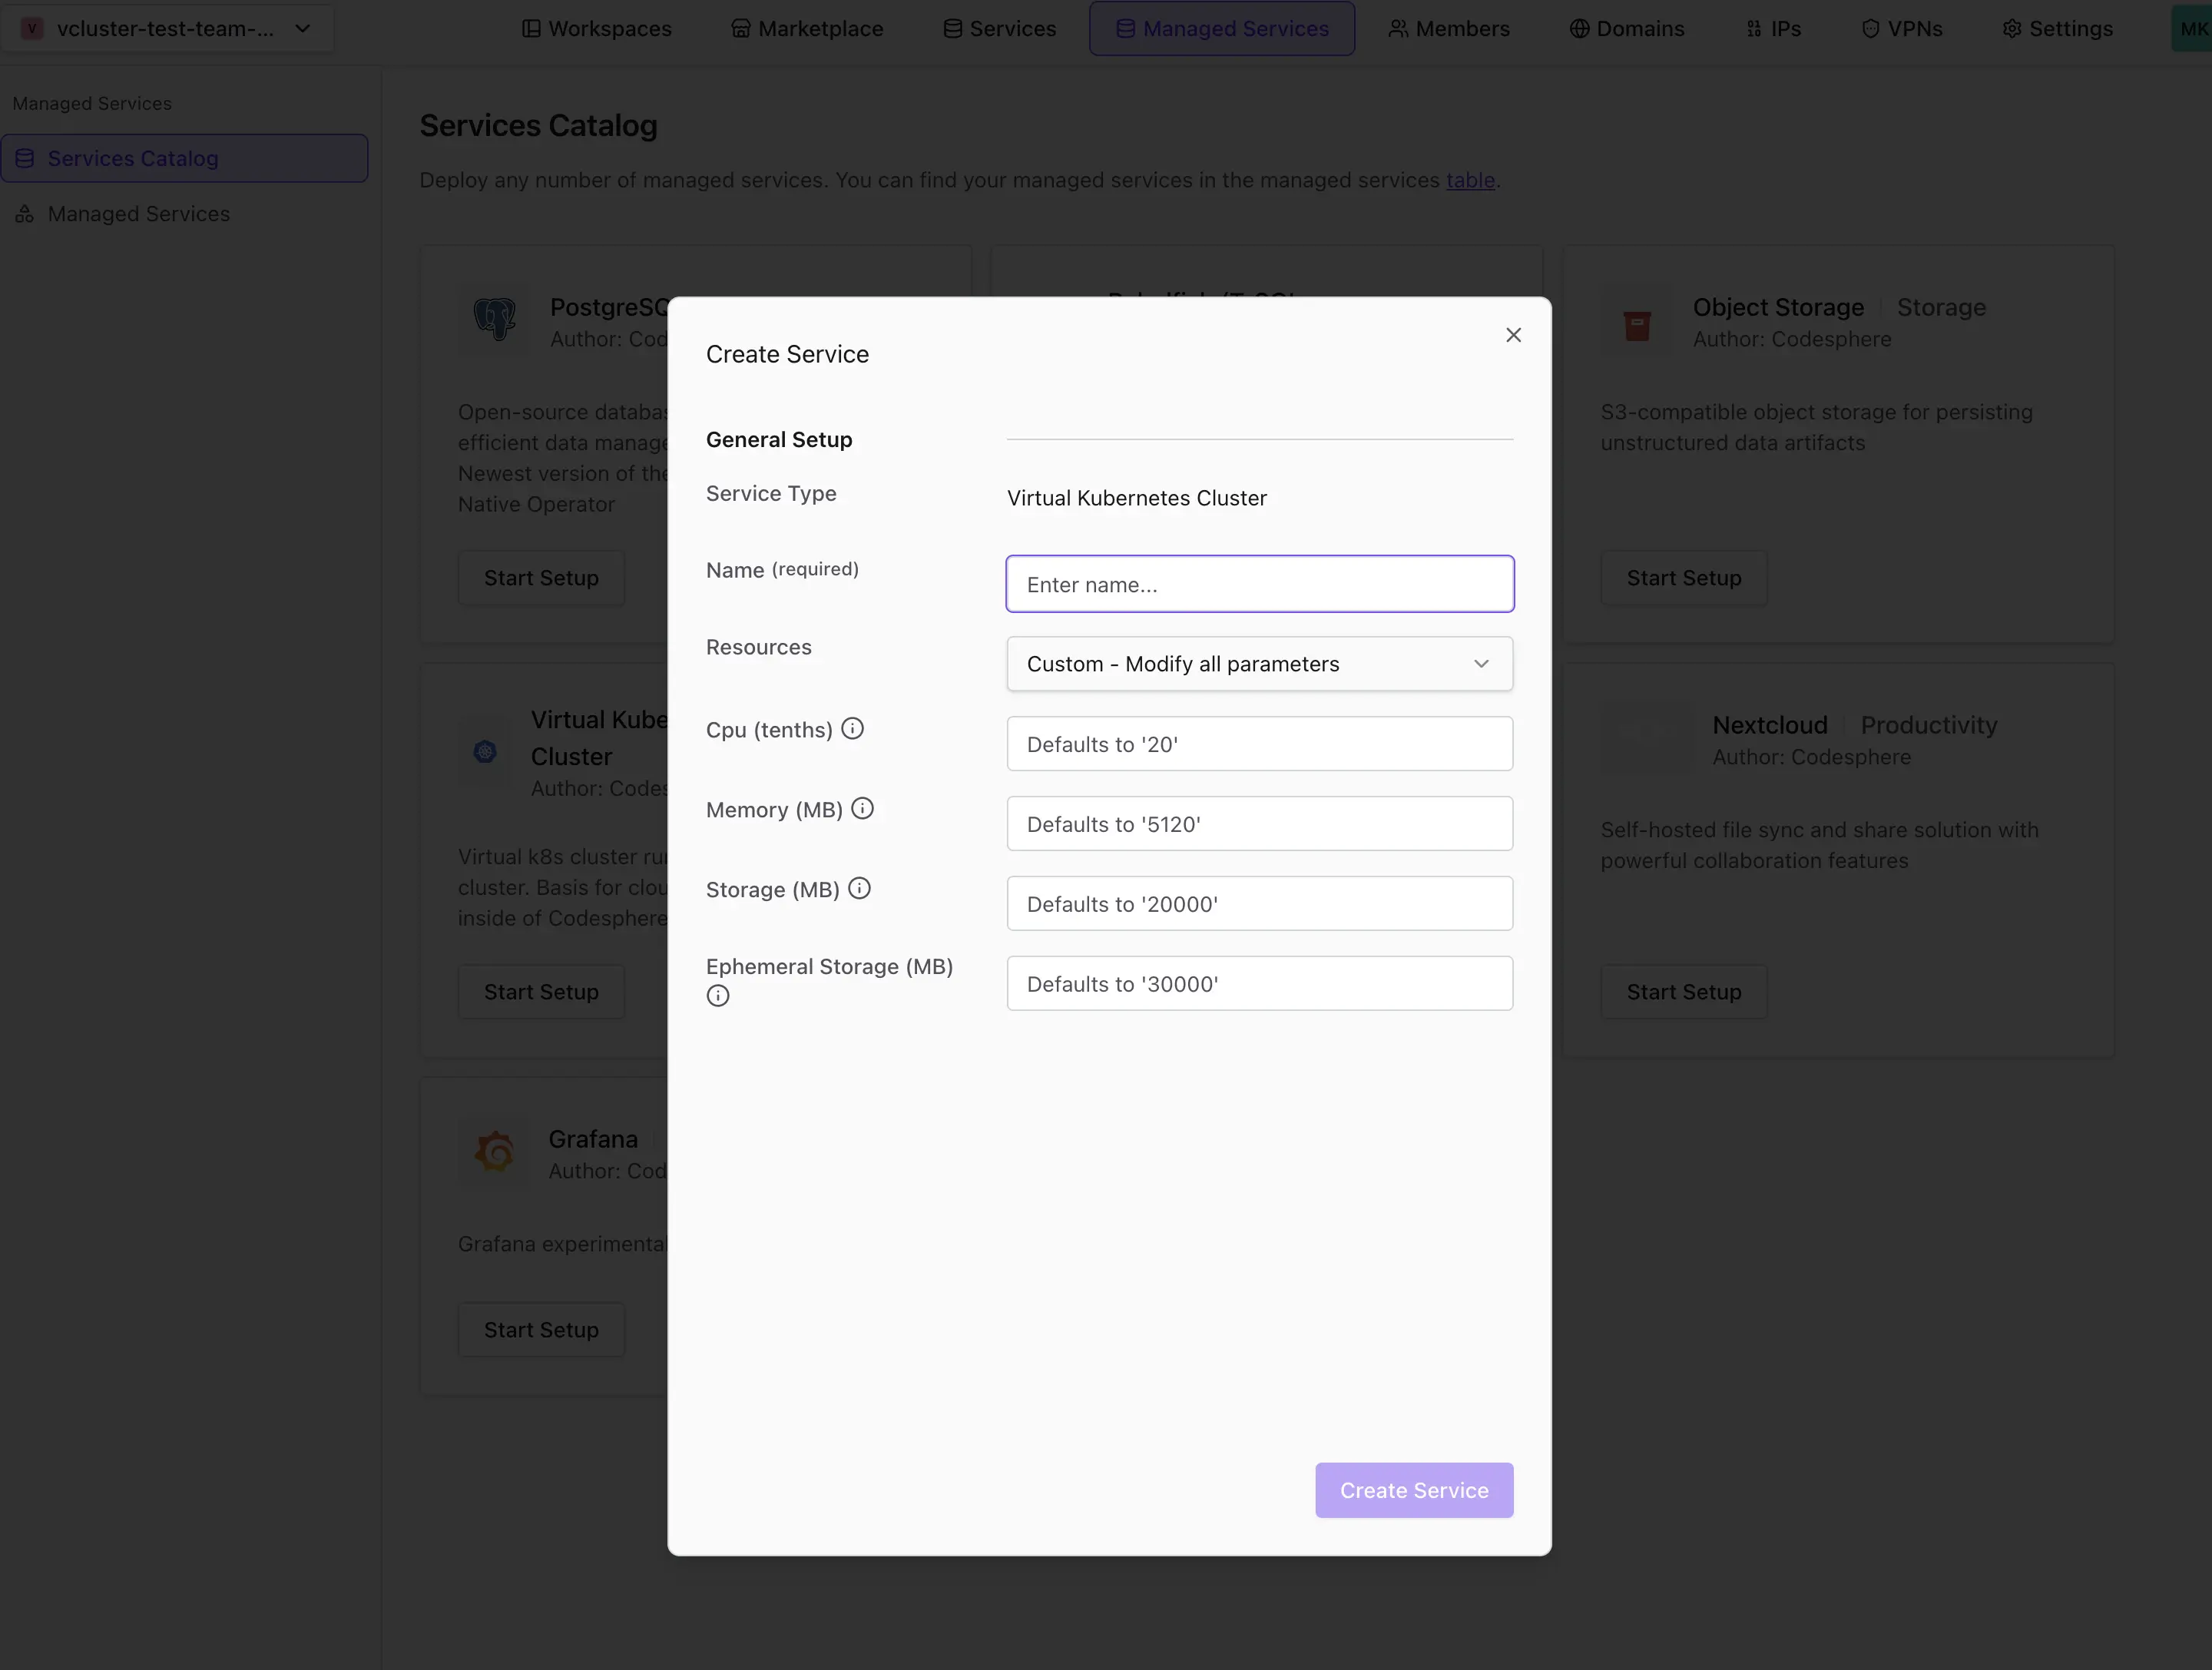
Select Virtual Kubernetes Cluster from the service catalog. This option lets you set up a new cluster for your team.
-
Enter a name and use according inputs to configure the Virtual Cluster resource quota according to your needs:
- vCPU
- Memory
- Storage
- Ephemeral storage
Each input sets the corresponding resource quota limit for the whole cluster — for example, the Memory slider sets the maximum accumulated memory available to all pods running in the cluster, not the memory of any single pod. Because quota also determines billing, set these values to match your workload's actual needs rather than maximizing them upfront.
-
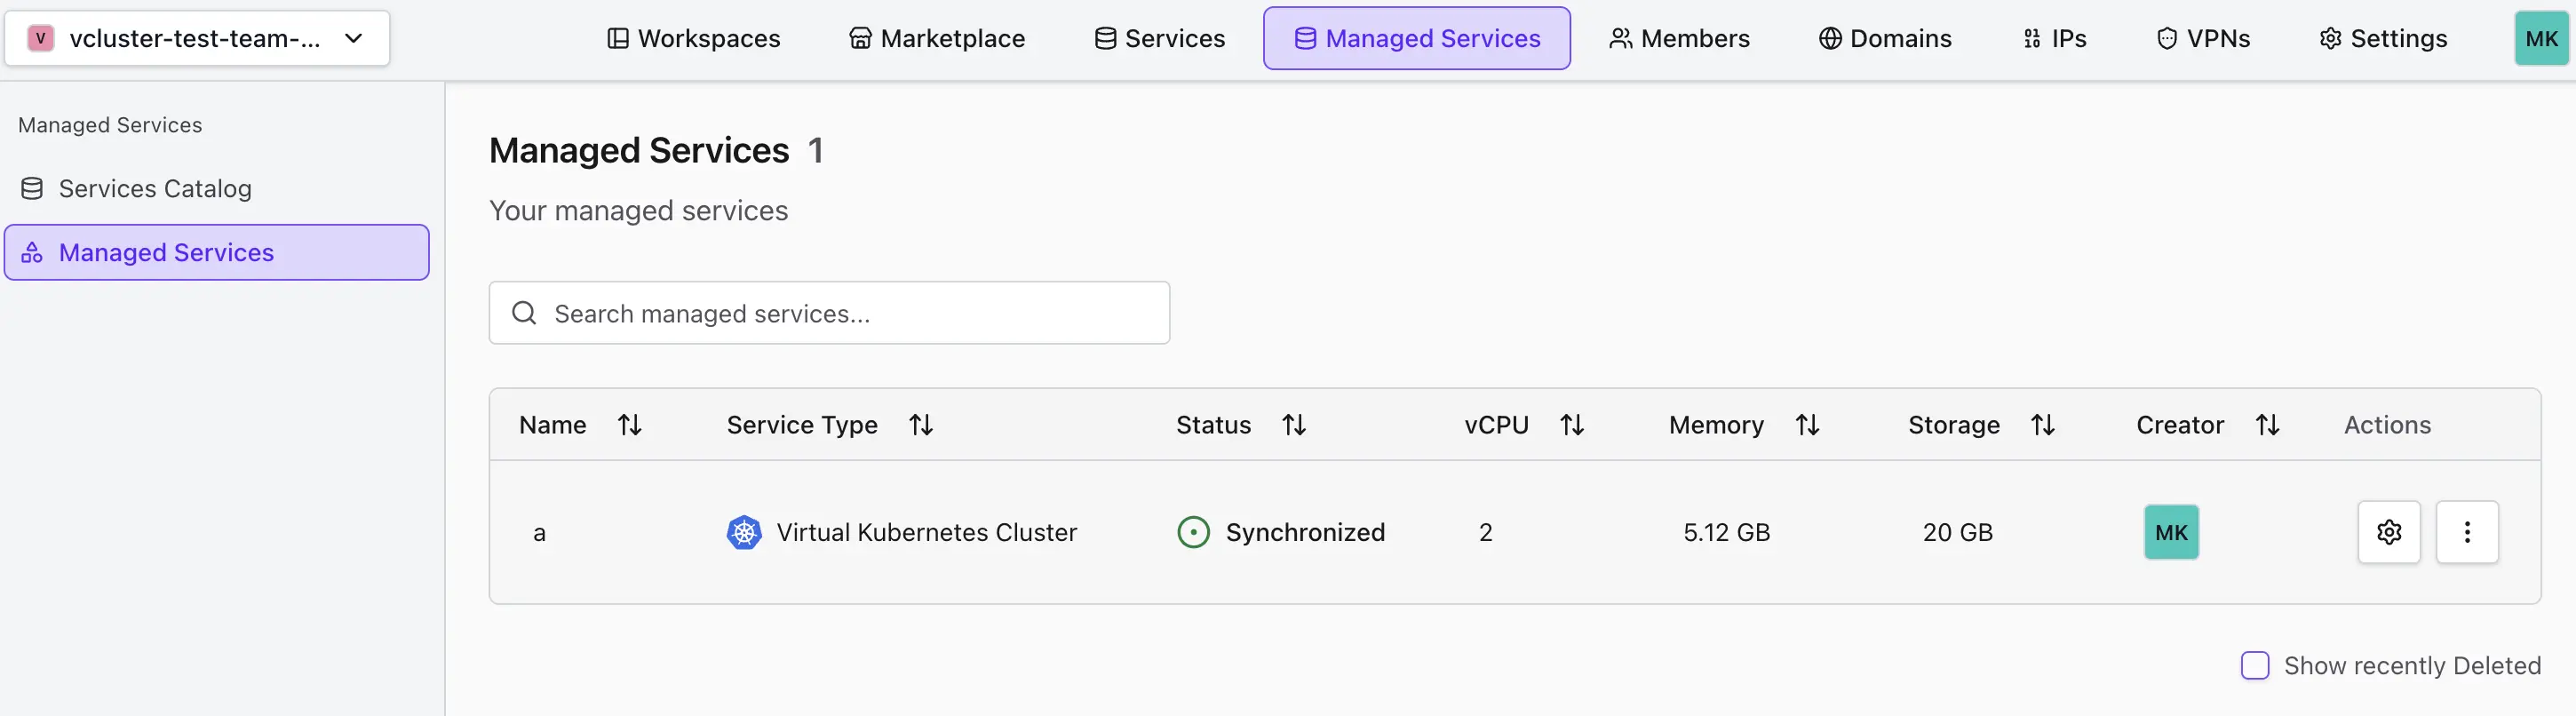
Confirm and wait for the cluster to become ready. Provisioning may take a few moments.
Modifying the Virtual Cluster
- Go to the Managed Services tab.
- Click Settings and open the Configuration tab for your cluster.
- Click Edit Configuration and adjust the resource quota values as needed.
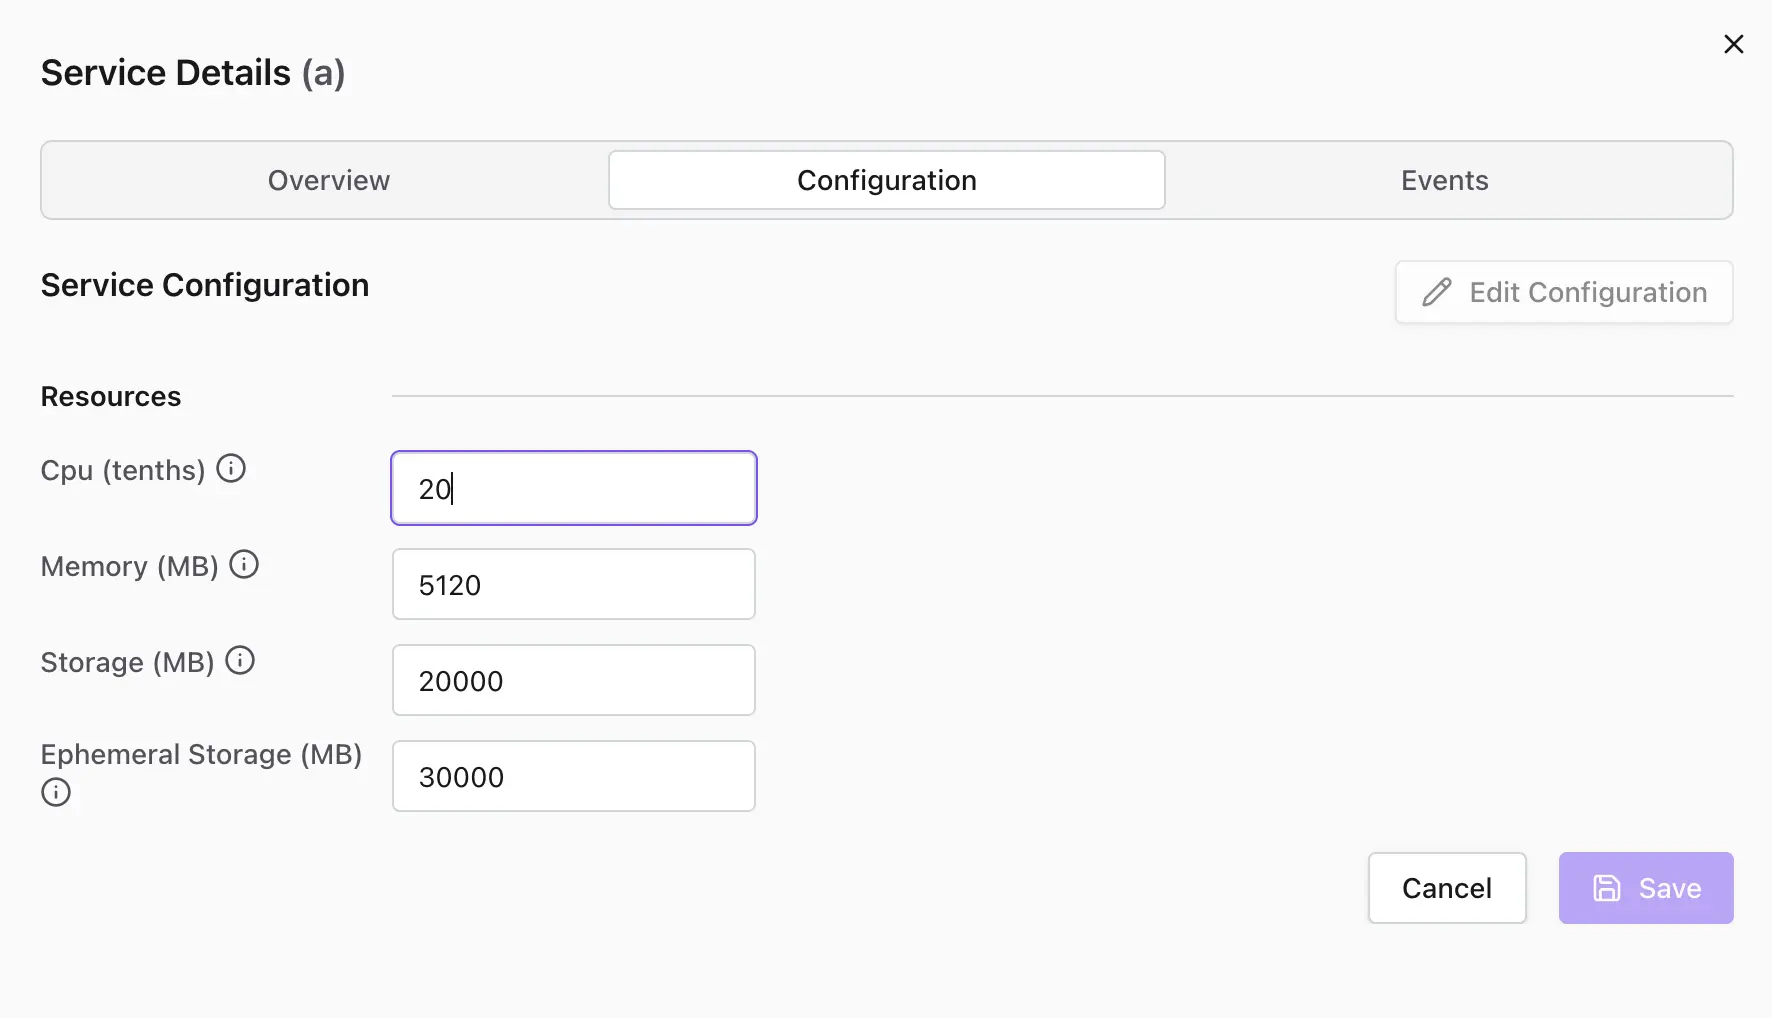
- Confirm and wait for the changes to take effect. The cluster will update its resources accordingly.
Virtual Cluster resource quotas
Virtual Clusters enforce resource boundaries using Kubernetes ResourceQuota and LimitRange objects. These settings control the maximum memory, CPU, storage, and ephemeral storage available inside the cluster.
- Pods must specify resource requests and limits to ensure fair usage and scheduling
- If a pod does not specify them, the default LimitRange is enforced
The Virtual Cluster resource quota currently limits the accumulated resource limits across all pods, not actual resource usage. If pods cannot be scheduled, try lowering individual pod limits to fit within your quota.
Current LimitRange is:
| Type | Resource | Default Request | Default Limit |
|---|---|---|---|
| Container | memory | 128Mi | 2Gi |
| Container | cpu | 100m | 500m |
| Container | ephemeral-storage | 500Mi | 6Gi |
How billing works
Virtual Clusters are billed based on their configured resource Quota (the vCPU, memory, storage, and ephemeral storage limits you set when creating or modifying the cluster) — not on what your workloads actually consume at any given moment.
This means raising a quota value increases cost even while pods are idle or only partially using that quota, and lowering a quota value reduces cost as long as your workloads still fit within it.
Example: If you configure a Virtual Cluster with 40 vCPU and 80 GiB of memory, you are billed for 40 vCPU and 80 GiB of memory whether your pods are idle or fully utilizing those resources. To reduce cost, size the quota to your workload's actual needs instead of over-provisioning for headroom you don't use.
Each quota parameter (vCPU, memory, storage, ephemeral storage) is billed as a separate unit. See the Virtual Kubernetes Cluster provider reference for the exact parameter ranges.
New Virtual Clusters default to a 30 GiB ephemeral storage quota, which comfortably avoids pod-scheduling failures out of the box but is more than most workloads need. If your pods don't rely on large temporary files, caches, or container image layers, consider lowering the Ephemeral storage quota when creating or modifying your cluster to reduce cost.
Troubleshooting quota errors
| Issue | Root Cause | Solution |
|---|---|---|
| Pods cannot be scheduled because of quota errors | The Virtual Cluster resource quota is too small, or the accumulated pod requests and limits exceed the configured quota | Update the Virtual Cluster configuration under Managed Services → your Virtual Cluster → Settings → Configuration, or lower individual pod requests and limits |
Deleting a Virtual Cluster
If you no longer need a cluster:
- Go to the Managed Services tab.
- Click Actions and select Delete for the cluster you want to remove. This action cannot be undone.
- Confirm and wait for the cluster to be removed.